This is a step-by-step example of how to create most of the commonly used windows controls, such as Listview, Treeview, etc. in the browser using the APL+WebComponent.
One of the most powerful tools you can have today is the ability to display your application in the browser. With APL+WebComponent you have the ability to build applications which can be stand alone or published to the web. The look and feel of your application can be virtually the same. There is no need to maintain two code bases, as one workspace can be used for both standalone and publishing. This is possible because with APL+WebComponent. you have []wi available in the browser as well as the APL language. In APL+WebComponent you will find the tools needed to not only publish your UI, but also to recognize where the code is running, transfer code to and from the server when required, and include Jscript in your APL code to be run in the browser for specialized situations.
Our goal with this example is to provide you with the ability to setup a client/server application using APL+Win, APL+WebServices and APL+WebComponent.
Start by downloading the example workspace here . Then follow the steps exactly as they are shown. That is, unless we have made an error, in that case skip that part and do it correctly :-)
There is definitely a learning curve to creating a client/server solution using the browser. Once you are familiar with the process, it is fairly simple, but initially it can be challenging. For those reasons we strongly suggest that if you are building a solution with a deadline that you contact Lescasse Consulting or APL2000 for help with your first application.
Ok, so here is the recipe!
Download the latest version of APL+WebServices and install.
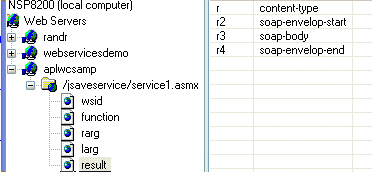
Create a server. In our example, we are going to create a server named aplwcsamp.
We set the ip address to "localhost" and the port to 9090
Choose a public directory (c:\aplwcsamp\public in our case)
Apply these changes and choose OK.
Next, add a new virtual Path.
Since we are using the APL+WebComponent the following is always the same.
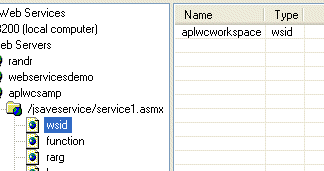
/jsaveservice/service1.asmx
Next we will set the wsid to:
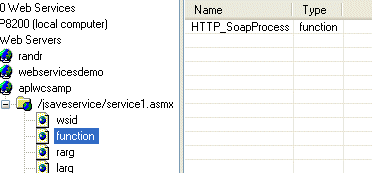
 Then set the function to:
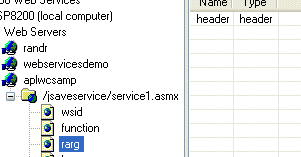
 Set the rarg to:
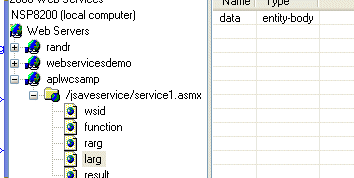
 The larg to:
 Finally, set return to:
We now need to setup the workspace, so we will add a workspace, name it aplwcworkspace with the following parameters:

The server is now setup and ready to accept our requests.
Next Download JsaveSDK.w3
Now Download jsavesdkfiles.zip
In our example we will unzip into the public directory, c:\aplwcsamp\public
Download aplws.w3
Create a copy of your workspace to be published, and copy aplws into that workspace.
In this case, we are going to publish our workspace named aplwctabs.w3 which you downloaded from the link referenced above.
So, we are going to copy the aplws functions into our aplwctabs workspace, and then save the workspace.
Load the JsaveSDK workspace, the latent expression is Initialize which will bring up the APL+WebComponent creation dialog.
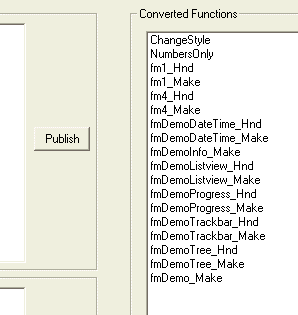
Under the Project menu select Import Workspace and choose your workspace to be published. This will display all the functions in your workspace in the "Workspace Functions" list control.
We will now highlight those functions we wish to publish and select the Publish button to the right of the function list. This will provide us with publishing options, and in our case we have chosen "Debug APL" and Maintain SI Info.
Next choose SaveAs under the File menu.
In our case we saved the project as aplwctabs.wjs
Now we will package our application. To do this we click the "Package" button and then select 1 for our IO, fm1_Make for our LX, and c:\aplwcsamp\public\aplwcsamp.htm for our filename. For this project we are leaving the APL Web Services URL empty.
That is it, the workspace is now published.
We will now go to our browser and enter:
http://localhost:9090/aplwctabs.htm
This will run the function fm1_Make in the browser and instantiate the form.
From this form we can instantiate a number of other forms with various controls such as.
ProgressBars
TrackBars
Listview
Treeviews
Menus
Separators
Buttons
Checkboxes
Spinners
Combos
Draw Comand on Picture object.
There are two places in our sample which transfers data between the browser and the server.
The first is on the first form which is created. If you click the "Add values on Server" the function fm1_Hnd is called, which then retrieves the values from the "ed1" and "ed2" text fields and passes them to the "Calculate" function on the server. The server returns the sum of these two values and the result is placed in the "ed3" text field.
The second place we go to the server for data is when we populate the listview control. In the fmDemoListview_Make function we have the line:
t„RunAtServer listviewdata
Which goes to the server, runs the listviewdata function and the result is placed in the variable "t" on the client, which in this case is a heterogeneous matrix used to populate listviews.
Creating a client/server application is relatively simple once you have done a few, but there is definitely a learning curve.
Some issues which can be troublesome are security issues in the browser, bursting cache in the browser, instantiating controls in the browser when a server side calculation is using 100% of the CPU on the same machine.